myPractice has been rebranded Bp Allied, a product of Best Practice Software.
Support is available Monday to Friday, 9am to 5pm AEST Version 4.18 Published 5 December 2019
Email: alliedsupport@bpsoftware.net Click RemoteSupport from within myPractice for assistance Phone: 1300 40 1111 (in Australia) or 0800 40 1111 (in New Zealand)
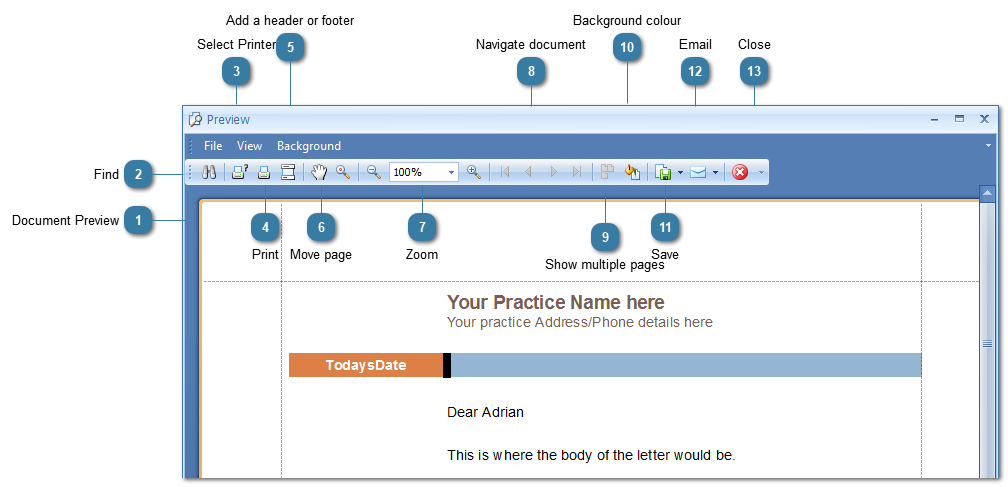
Print Preview
Choosing Print Preview allows the viewing of a document as it would be printed by your printer. Print Preview opens in a window separate to the myPractice window. it needs to be closed before you can continue to use myPractice.